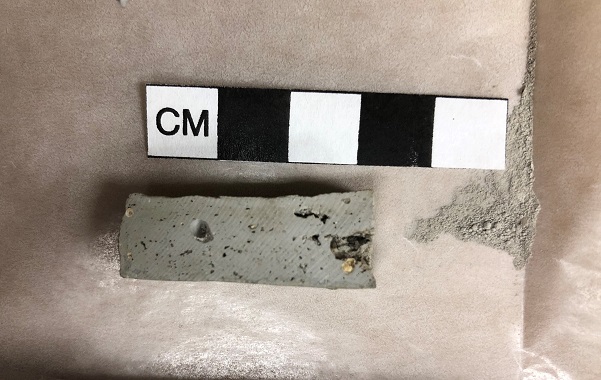
In some instances, you may be unable to submit whole or fragmented artifacts for analysis. In these cases, drilling a powder from the artifact may be the only way to obtain an analytical sample. We do not recommend drilling specimens unless this is absolutely the only manner in which the specimen may be sampled. Drilling ceramic specimens carries a high potential of introducing contamination even in the most ideal of situations.
Additional information concerning contamination and drill-bit selection may be found in the following article:
- Boulanger, M.T., S. Fehrenbach and M.D. Glascock (2013). "Experimental evaluation of sample-extraction methods and the potential for contamination in ceramic specimens." Archaeometry 55(5): 880-892.
Roughly 1.0 gram of powder will ensure a representative sample of the artifact. A minimum of 0.25 grams of powder is needed for NAA. Please take care to avoid any areas of an artifact that may contain modern substances such as adhesives, labeling chemical (i.e., ink, B-72, etc.), or any portion of the artifact that is not part of what you want to analyze. Solid tungsten-carbide bits are recommended. Replace worn drill bits to avoid contamination of the sample. Drill bits can and should be resharpened regularly.
Please note that drilling a sample will increase the chances of contaminate metals being introduced into your sample.
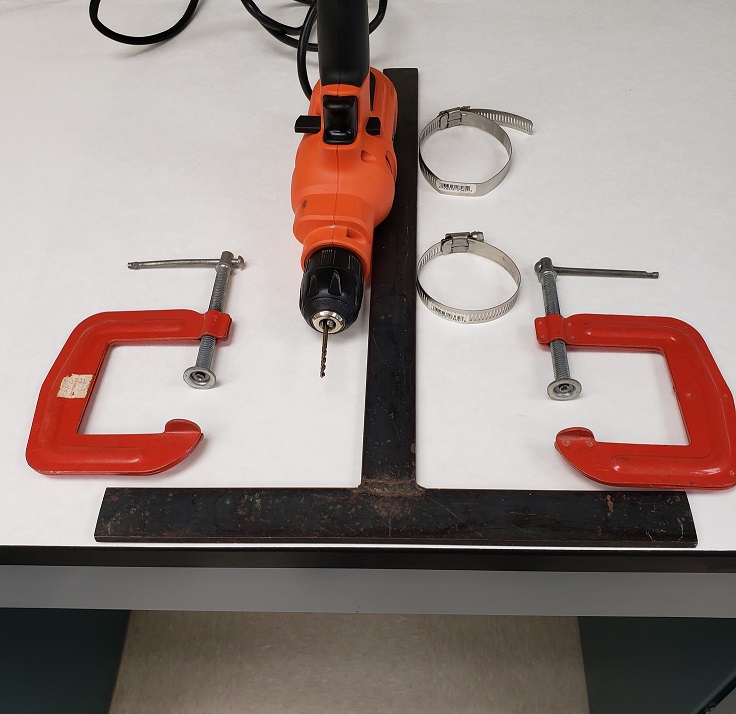
The ideal sampling kit should contain the following equipment and supplies:
- Drill or Dremel® Multi-tool
- Solid Tungsten-Carbide drill bits
- Glassine weighing paper or aluminum foil (used to collect powder)
- Tissues such as Kimwipes (used to wipe bits)
- Acetone or alcohol (to rinse drill bits between samples)
- Plastic bag, poly-vial, or glass vial (to hold sample powder)
- Tape and indelible marker (to label vial)
- Pad and pencil (for recording description and precise sampling location)
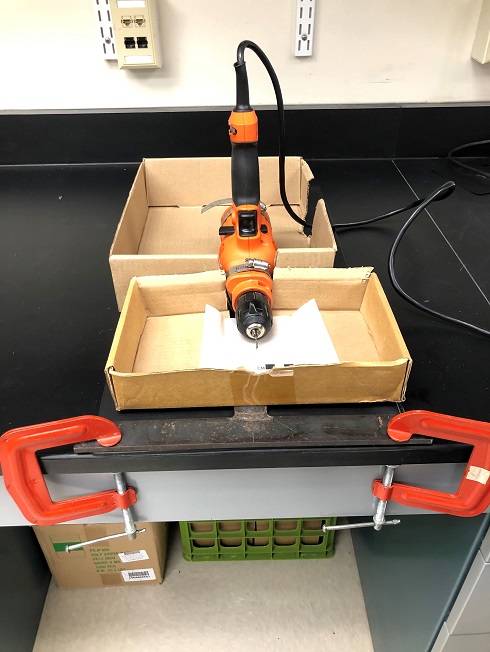
Instructions for Drilling Powders from Archaeological Samples
- Place glassine weighing paper or aluminum foil beneath the artifact.
- Begin drilling artifact perpendicular to artifact edge. Multiple holes may be necessary.
- After drilling ca. 1 mm into the artifact stop, and discard powder (to minimize possible contamination from the artifact surface).
- Clean the bit with acetone/alcohol.
- Continue drilling slowly to minimize chipping and wear on the drill bit. Ensure that the drill remains perpendicular to the surface of the artifact.
- After ca. 1.0 gram has been extracted from the artifact, carefully pour the powder from the weighing paper or foil into the glass or poly-vial.
- Label vial with appropriate accession number and MURR ANID.
- Using pencil, record accession number, MURR ANID, and any descriptive information for the artifact from which the powder was obtained.
- Use tape to secure the lid on the glass or poly-vial.
- Clean the work area to remove any excess powder.
- Wipe the drill bit with a tissue.
- Clean the bit with acetone/alcohol.
- Place a new piece of weighing paper or foil on the table, and repeat steps until all samples have been obtained.